
Summary Notes on Google Analytics: Property Settings
Just some notes for personal reference when settings up Google Analytics:
As we go through the settings and configuration of Google Analytics it helps to understand what each of the settings do. Looking solely at the Property Settings this is a rough explanation:
Basic Settings
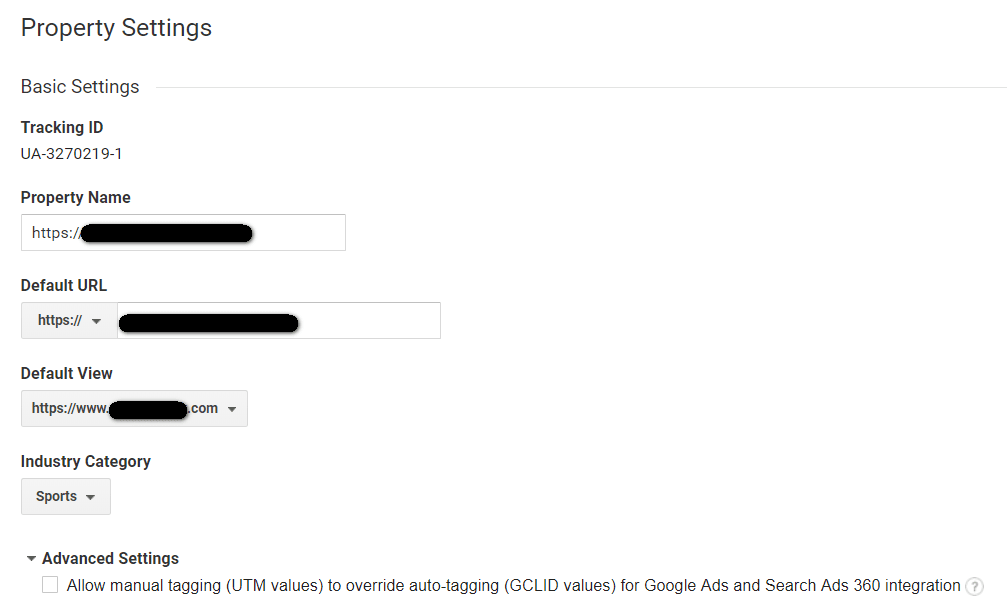
Tracking Code: Assigned by Google to this Property… there should be 1 property per Domain Name or in certain circumstances per Sub-Domain Name: For example, you might want to have a separate Analytics Tracking Code for blog.yourdomain.com.
Property Name: I use the full URL that I am planning to Track… I do this because I want to easily see if it is HTTPS or just HTTP.
Default URL: Make sure to select the correct HTTP or HTTPS version
Default View: If you have multiple Views, which you should, then you might want to select the Default View. I also always choose the one that will have the most meaning for me, or the one that has the most accurate data that I want to see.
Industry Category: Now, Google starts ‘comparing’… the purpose here is to benchmark your activities against other like minded websites. There is no point in comparing your Art Gallery with Tescos, just because you are in Retail… so in a very small way you can start your customisation here, but telling Google broadly the sort of website you have.
Advanced Settings: Leave Blank, this is required occasionally if you have problems with Google Analytics or similar. It’s really for specialist or problem-solving use only.
Property Hit Volume

This sections just lists some Stats on the Property (not the View)
Advertising Features

Essential if you are using Remarketing and highly recommended if you are using Google Ads, there can be no harm in switching this on for all other situations. The results are shown in Reports like ‘Audience -> Demographics’ and you can get a sense of gender, age and interests.
In-Page Analytics
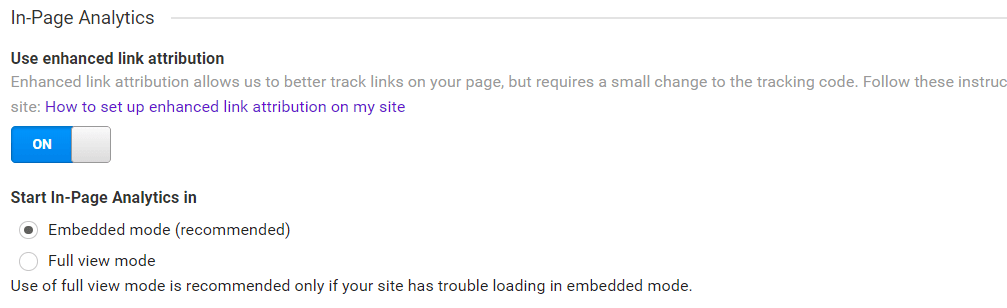
In-Page Analytics allow you to view the website with an Overlay of Analytics Information. You can then see which Users are click on What Links on the page. For example, which Menu Items, Features or Footer Links.
But there are some issues:
- You can no longer access In-Page Analytics via the Analytics Dashboard – you need to install the Google Chrome Extension.
- You need to make sure every link on the page is identifiable. Analytics will look for an ID up to 3 levels up from the link.
- You need to make sure you add or alter the GA Code to include the LINKID… this can also be done in Google Tag Manager if you re using that.
- And finally, to test this – you can look at links with the same destination on your page… if they show identical click percentages, then something is not right, it is improbable that the same number of Users clicked a Footer link as at top Menu item.
In-Page Analytics allow you to see where people are clicking on Links, but it does not work unless you set it up right.
Search Console

It is always worth connecting the Search Console to Analytics, this allows you to see more information on Ranking and Keywords within Analytics. However, you must make sure the Default URL (above) matches the URL you have set up in Search Console otherwise data discrepancies will occur.
User Analysis

This is another ‘decision’ item that you can elect to use or not. However, it can be essential once you understand what it does.
Users Vs Visitors Vs Sessions
In short, unless User Analysis is switched on your primary measurement will probably be Sessions. A Session is a full track record of a User until they stop using the website for a period of 30 minutes.
The issue with Sessions is that a single user can have lots of sessions either from their ‘device’ or just over time… they have repeatedly visit the website.
With User Metrics not enabled you’ll see this:

With User Metrics enabled you’ll see this:

We recommend (and please comment if you disagree):
- Measure Sessions primarily – after all most Tracking suggests you want to know the overall number of times your website is visited regardless of whether they are returning or device specific or the same person. You just want to know you had lots of visitors.
- But switch on User Metrics – it allows more in-depth analysis especially on New and Returning users. You get more reporting.
Conclusion
This about sums up the set up required for a Property in Google Analytics. It’s important not to forget to Save everything, but I hope this post explains just a little be more about some of the extra features available in Google Analytics and helps you make an informed choice for some of these features.