
Installing Facebook Comments on Blogger
First things first, I’m only about 95% there so far… working this out as I go along. The key difference between this ‘new’ Commenting system and the old is that if you get this right, you should be able to comment either as your self or as a page you administer. (To the less techie out there – this means you can choose to comment either as yourself or as your company).
Pros and cons are being left to one side for now, personally I think this has massive implication for improving the popularity of your Facebook Page. Lastly, this is very much direct towards Blogger, although I suspect the theory to be the same for all blogs and indeed website/pages.
- Stage 1 – Go to http://www.facebook.com/developers/ first. In the top right you’ll see a button to Set Up New App.
- Give it a Name and Agree to the terms and conditions, you may get a Captcha, just fill in the letters and number and continue.
- You’ll come to a page that allows you to edit the App settings… here you can add a Description and maybe some logos, this is voluntary.
- Click on the ‘Mobile & Devices’ Tab on the left and copy/paste the Application ID (a 15 digit number) into Notepad.
———– - Stage 2 – Now go to http://developers.facebook.com/docs/reference/plugins/comments/
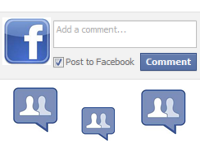
- You should see a Facebook grey/blue box where you can fill in your URL, posts and width… go for it. You can also read more about the Comment system here.
- You should end up with a piece of code like this
<div id=”fb-root”></div>
<script src=”http://connect.facebook.net/en_US/all.js#appId=YOUR_APP_ID&xfbml=1″></script>
<fb:comments href=”YOUR_URL_HERE” num_posts=”10″ width=”500″>
</fb:comments>Where YOUR_APP_ID is the Application Id you noted in Step 4 and YOUR_URL_HERE is the actual URL of the page in question.
———– - Stage 3 – Now we’re ready to go to Blogger or any other website… In Blogger though you need to go to the ‘Design’ tab and then select ‘Edit HTML’. You can take a Back Up of your Blogger Code before proceeding
- Just above the HTML box with your HTML code in it you need to tick the box marked ‘Expand Widget Templates’
- You need to scoll about half way down until you see… You can actually place the code anywhere you like, but either after the <data:post.body> or as I have done just before the <div class=’post-footer’> seems to work best.
- Paste the Facebook Code, save and view blog – you’re done.
See update below
Now very sadly we’re not done yet. There is a problem and I don’t know how to fix it. That is when set up in this way only 1 URL can be used… your Blogger URL, that would be fine for any static website, but when there is no tie here between which Post you’re commenting on. And that is very frustrating.
If any one can help – I’d appreciate it.
Updated: If you replace the href=”YOUR_URL_HERE” with expr:href=’data:post.url’ – everything will work…
I wrote this article after reading the following links:
http://www.blogger-bookmark.com/2010/09/how-to-install-facebook-comments-on.html
http://www.allblogtools.com/tricks-and-hacks/exclusive-integrate-facebook-comments-box-for-blogger-in-very-easy-and-simple-steps-full-guide/
http://www.justinwheeler.net/socialmedia/twitter/twitter-odd-algorithm-or-just-me.html
Both set me on the road and I’d like to thank them and give credit to them.